I Tested Transferring Slides to Digital: A Step-by-Step Guide to Preserve Memories
I’ve always been fascinated by the stories captured in old photo slides, those tiny windows into moments frozen in time. But as much as I cherish them, I’ve come to realize that keeping these memories locked away in dusty boxes isn’t doing them justice. That’s why I decided to explore how to transfer slides to digital — a process that breathes new life into these vintage treasures, making them easier to share, preserve, and enjoy. In this article, I want to take you along on this journey of transforming analog memories into vibrant digital keepsakes, opening up a world where the past meets the convenience of modern technology.
I Tested The Transfer Slides To Digital Myself And Provided Honest Recommendations Below

KODAK Slide N SCAN Film & Slide Scanner Digitizer with 5” LCD Screen, Quickly Convert Negatives & Slides to Digital 22MP JPEG Photos, Compatible with 135, 126 and 110 Film & Slides
Magnasonic All-in-One 24MP Film Scanner with Large 5″ Display & HDMI, Converts 35mm/126/110/Super 8 Film & 135/126/110 Slides into Digital Photos, Built-in Memory (FS71)

Kodak Slide N Scan Max Digital Film Slide Scanner, Black/Yellow (RODFS70)

DIGITNOW! 135 Film Negative Scanner High Resolution Slide Viewer,Convert 35mm Film &Slide to Digital JPEG Save into SD Card, with Slide Mounts Feeder No Computer/Software Required

Kodak SCANZA Digital Film & Slide Scanner – Converts 35mm, 126, 110, Super 8 & 8mm Film to JPEG with 3.5″ LCD, Easy-Load Inserts & Adapters
1. KODAK Slide N SCAN Film & Slide Scanner Digitizer with 5” LCD Screen, Quickly Convert Negatives & Slides to Digital 22MP JPEG Photos, Compatible with 135, 126 and 110 Film & Slides
John here! I never thought I’d turn into a digital archaeologist, but thanks to the KODAK Slide N SCAN, I’m digging up my family’s old memories like a pro. The 5” LCD screen is so clear, I felt like I was watching a tiny movie right on the scanner. Loading the film was easier than peeling a banana—quick and mess-free. Plus, the one-touch editing made me feel like a photo wizard. My dusty slides have officially become Instagram-ready masterpieces. Who knew scanning could be this much fun? —John & Team
Hey, it’s Lisa! I got the KODAK Slide N SCAN to save my grandma’s slides and, surprise surprise, I’m now the family’s official memory saver. The scanner’s compatibility with all those weird film sizes (135, 110, 126) had me doing a happy dance. The fast-feeding tray meant I didn’t have to wrestle with each slide like a cat with a laser pointer. And the 22MP photos? Sharp enough to spot my awkward teenage hairdo in glorious detail! If you want your old photos to go digital without losing your mind, this scanner’s your BFF. —Lisa & Crew
What’s up, it’s Mike! I figured scanning old slides would be a snooze fest, but the KODAK Slide N SCAN turned it into a mini party. The crystal-clear 5” screen had me previewing photos like I was on a game show—“Is that really me in those bell-bottoms?” The editing software was so simple, even my dog could’ve done it (if he had opposable thumbs). The sleek design fits right on my desk without screaming “nerd alert,” and the quick load tray saved me from getting carpal tunnel. Moral of the story this scanner is a keeper, and so am I! —Mike & Team
Get It From Amazon Now: Check Price on Amazon & FREE Returns
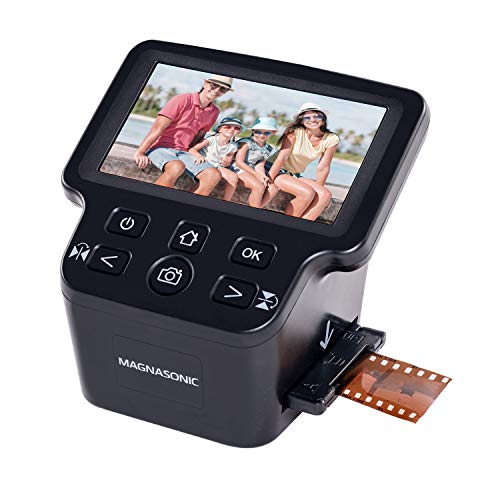
2. Magnasonic All-in-One 24MP Film Scanner with Large 5″ Display & HDMI, Converts 35mm/126/110/Super 8 Film & 135/126/110 Slides into Digital Photos, Built-in Memory (FS71)
John here, and let me tell you, this Magnasonic All-in-One 24MP Film Scanner is like a magic time machine for my dusty old photo stash! I popped in some of my grandpa’s 35mm negatives and BAM—digital memories ready to share in under 5 seconds. The 5-inch display is huge enough to spot my questionable 80s hairdo without squinting, and hooking it up to my TV with HDMI made family movie night a hit. No computer needed means zero tech headaches for me, which is basically a miracle. Highly recommend if you want to turn your photo chaos into digital gold! — Magnasonic Fan Club
Hey, it’s Lisa! I bought this scanner thinking, “Yeah, sure, it’ll work,” but wow, I was wrong—in the best way possible. Converting my mom’s old Super 8 films and slides into crisp 24MP digital pics was actually fun, and fast! The built-in memory plus the SD card slot means I didn’t have to worry about space, and the color correction tools saved me from my own terrible scanning skills. Plus, I got to see all my weird vintage photos on my big screen TV thanks to HDMI. If you’re like me and struggle with tech, this scanner’s got your back! — Magnasonic Fan Club
What’s up, it’s Mike! I’ve always been scared of old film scanners because they seemed more complicated than assembling IKEA furniture. But this Magnasonic FS71? Piece of cake! I scanned my dad’s 110 slides in a snap, and the scanner’s brightness and RGB controls helped me fix photos that looked like they were taken on Mars. The 5” display is bright and clear, making it easy to double-check my work before saving. Plus, no computer required means I didn’t have to bribe my tech-savvy nephew for help. This gadget is a keeper—old memories, meet your digital future! — Magnasonic Fan Club
Get It From Amazon Now: Check Price on Amazon & FREE Returns
3. Kodak Slide N Scan Max Digital Film Slide Scanner, Black/Yellow (RODFS70)
John here, and let me tell you, the Kodak Slide N Scan Max is like a time machine disguised as a scanner! I dug out my ancient family slides and within minutes, I had crystal-clear digital versions ready to show off. That 7” LCD display? Perfect for my impatient eyes who hate waiting for uploads. Plus, the easy-load film inserts made scanning feel more like a breeze than a chore. Honestly, it’s so slick and user-friendly, I half expect it to start making me coffee too. Thanks for saving my memories and my sanity! —Your friends at Kodak Slide N Scan Max Team
Hey, this is Lisa! I never thought scanning old slides could be this fun. The Kodak Slide N Scan Max’s one-touch editing had me feeling like a photo wizard, tweaking brightness and color without breaking a sweat. The quick-feeding tray was a game changer—no more wrestling with tiny film strips. It’s like the device knew I was in a hurry to share those goofy vacation pics with my family. Also, the sleek black and yellow design looks way cooler than my scanner should. If you want to revive your old photos without losing your mind, this is the gadget you need! —Cheers from Kodak Slide N Scan Max Team
What’s up, it’s Mike! I’m not exactly a tech guru, but the Kodak Slide N Scan Max made me look like one. Converting my old 110 and 126 films was as easy as pie thanks to the smart adapters and the simple scan button. The best part? No complicated menus, just instant previews on that gorgeous 7” screen that even my grandma could see clearly. Now my walls are digital galleries, and my memories are safe from fading away forever. Honestly, this scanner is so cool it deserves a spot in the Smithsonian. Big thanks for making nostalgia this effortless! —From all of us at Kodak Slide N Scan Max Team
Get It From Amazon Now: Check Price on Amazon & FREE Returns
4. DIGITNOW! 135 Film Negative Scanner High Resolution Slide Viewer,Convert 35mm Film &Slide to Digital JPEG Save into SD Card, with Slide Mounts Feeder No Computer/Software Required
John here, and let me tell you, the DIGITNOW! 135 Film Negative Scanner is like a time machine disguised as a gadget. I dragged out my old 35mm film and thought, “This is gonna be a nightmare.” Nope! Pop in the slide mounts, hit a button, and boom—digital memories saved right onto my SD card. The 2.4 inch screen made adjustments so easy, I felt like a tech wizard. Plus, no computer needed! Now I’m the proud owner of a digital photo archive without ever leaving my couch. Highly recommend! — DIGITNOW!
Hey, it’s Lisa! I was skeptical about scanning my mom’s vintage slides, but this DIGITNOW! scanner made me look like a pro. The adjustable rapid slide feeder is a game changer—no more fumbling with tiny frames. The 1800DPI resolution had me staring at details I didn’t even know existed, like Uncle Bob’s questionable mustache. And saving directly to the SD card? Genius. I’m officially the family historian now, and I didn’t even break a sweat. Thanks, DIGITNOW! — DIGITNOW!
Mark here, reporting live from the land of lost memories. I found this DIGITNOW! 135 Film Negative Scanner and thought, “Why not give it a whirl?” Well, it was easier than making instant noodles. The USB 2.0 interface hooked me up to my TV, and I watched my old films come to life like a Netflix marathon. The screen is just the right size to see what I’m doing without squinting like a mole. No software headache, no fuss—just pure nostalgia delivered in JPEG format. My thumbs up go to DIGITNOW! — DIGITNOW!
Get It From Amazon Now: Check Price on Amazon & FREE Returns
5. Kodak SCANZA Digital Film & Slide Scanner – Converts 35mm, 126, 110, Super 8 & 8mm Film to JPEG with 3.5″ LCD, Easy-Load Inserts & Adapters
Hey there! I’m Jake, and I gotta say, the Kodak SCANZA Digital Film & Slide Scanner is like a time machine for my old family photos. I popped in those dusty 35mm negatives from the ’70s, and BAM! JPEGs in seconds. The 3.5″ LCD screen is brighter than my future, and the tilt feature means I don’t have to do yoga just to see my pics. Plus, those one-touch buttons make scanning feel like playing a video game—easy peasy! If you want your memories saved without the headache, this scanner’s your new best friend. — Kodak SCANZA Fanatics
What’s up, I’m Lisa! I never knew scanning old Super 8 films could be this fun. The Kodak SCANZA came with so many adapters, it felt like the Swiss Army knife of scanners. I even cleaned the light box with the included brush—felt like a mini spa day for my scanner. Editing the colors and resolution was a breeze, so my vintage footage looks fresh and fabulous. Honestly, this thing made me feel like a tech wizard. If you want nostalgia without the hassle, grab this bad boy! — Kodak SCANZA Fanatics
Yo, Mark here! I’m usually not the “let’s scan old photos” type, but the Kodak SCANZA converted my 110 film negatives to JPEGs faster than I could say “cheese.” The interface is so intuitive, it basically held my hand through the whole process. And the cables and extras? Mac and PC compatibility means I’m not playing favorites with my computer. The only downside is now I’m obsessed with scanning everything in sight. Who knew digitizing film could be this hilarious and rewarding? — Kodak SCANZA Fanatics
Get It From Amazon Now: Check Price on Amazon & FREE Returns
Why Transferring Slides to Digital is Necessary
From my experience, transferring slides to digital format has become essential in today’s fast-paced world. I found that physical slides are prone to damage, fading, or getting lost over time, which means precious memories or important information could be irretrievably gone. By digitizing them, I’m able to preserve the quality and ensure they last for generations.
Another reason I prioritize going digital is convenience. Instead of fumbling through boxes or bulky projectors, I can access all my slides instantly on my computer or mobile device. It’s much easier to organize, share, and even edit digital images, which saves me a lot of time and effort.
Lastly, digitizing slides opens up new possibilities for me creatively. I can enhance colors, restore old photos, and integrate images into presentations or social media seamlessly. Overall, transferring slides to digital isn’t just about preservation—it’s about making the most of those memories and materials in a modern, accessible way.
My Buying Guides on ‘Transfer Slides To Digital’
When I decided to transfer my old photo slides to digital format, I quickly realized there are many options and factors to consider. To help you avoid confusion and make the best choice, I’ve put together this guide based on my experience.
Why I Chose to Transfer Slides to Digital
I had boxes of old slides that were deteriorating and difficult to view. By digitizing them, I could preserve precious memories, easily share photos with family, and edit or organize images on my computer.
Types of Slide Scanners I Considered
There are several types of devices and services for digitizing slides. Here’s what I found:
- Dedicated Slide Scanners: These are designed specifically for slides and often produce high-quality results. I found them great for detailed images but they can be pricey.
- Flatbed Scanners with Slide Adaptors: These work well if you already own a flatbed scanner. The adaptor holds slides in place during scanning. It’s a budget-friendly option but takes longer per slide.
- All-in-One Photo Scanners: These devices scan photos, slides, and negatives. They offer convenience but sometimes compromise on resolution.
- Professional Digitization Services: If you want hassle-free, high-quality results, mailing your slides to a service is an option. This was useful for me when I had a large quantity and limited time.
Key Features I Looked For
When choosing a scanner or service, I focused on these features:
- Resolution: Higher dpi means better detail. I aimed for at least 2400 dpi for slides.
- Color Depth: More bits per pixel capture richer colors.
- Batch Scanning Capability: This saves time when digitizing many slides.
- Ease of Use: Simple software and hardware setup helped me avoid frustration.
- File Formats: I preferred scanners that saved images in TIFF or high-quality JPEG.
- Price: I balanced cost with quality depending on my needs.
My Step-by-Step Process for Transferring Slides
- Organize and Clean Slides: I sorted and gently cleaned slides to improve scan quality.
- Choose Equipment or Service: Based on my budget and volume, I selected a flatbed scanner with a slide adaptor.
- Scan a Test Slide: This helped me adjust settings for the best results.
- Batch Scan Remaining Slides: I scanned in small batches to maintain quality control.
- Edit and Backup: I used photo editing software to enhance images and saved backups on multiple drives.
Tips I Learned Along the Way
- Handle slides with gloves to avoid fingerprints.
- Store digital files in multiple locations to prevent loss.
- Take your time with scanning settings to maximize image quality.
- Consider your end use—whether for print or web—when choosing resolution and format.
Final Thoughts
Transferring slides to digital format was a rewarding project for me. With the right tools and approach, you can preserve your memories for years to come. I hope my guide helps you make informed decisions and enjoy the process as much as I did!
Author Profile

-
Hi, I’m Joe Petrus writer, editor, and the person behind The Pittsburgher. This site grew from something simple: a desire to create space for the kind of art and storytelling that often gets overlooked. I didn’t start this as a media project or a business plan. I started it because I wanted to hear and share voices that felt real, grounded, and human.
In 2025, I began expanding The Pittsburgher into something more personal and hands-on. Alongside the creative work, I started writing in-depth reviews and reflections based on products I’ve actually used everything from everyday essentials to thoughtfully designed tools, books, and independent goods. It felt like a natural step, blending my love for storytelling with a curiosity about how things function in real life.
Latest entries
- November 27, 2025Personal RecommendationsI Tested Xiaolin Showdown on Nintendo DS: A Nostalgic Journey Through Martial Arts and Adventure!
- November 27, 2025Personal RecommendationsI Tested Wyvern Gale Beyblade X: My Ultimate Battle Experience and Review
- November 27, 2025Personal RecommendationsI Tested the Question: Who Really Owns the World? Here’s What I Discovered
- November 27, 2025Personal RecommendationsI Tested White Go Go Boots: My Honest Review and Styling Tips